

50 Minute Māori Fried Bread Recipe For Families No Knead, Missy Lala Mix
Golden and crisp outside, pillowy soft inside, this Māori fried bread recipe (parāoa parai) needs just five pantry staples and a hot pan. Mix a simple dough, let it rest, shape it into rounds, then shallow-fry until deep golden brown. Total time runs about 50 minutes, and the batch yields a moderate number of pieces, perfect for a family breakfast or a shared plate at the next gathering.
TL;DR:
- Using self-raising flour reduces resting time and simplifies the process, but high-grade flour with baking powder allows for more control over rise and flavor.
- Maintaining the oil temperature between 160 to 165°C is crucial to avoid greasy or undercooked bread, requiring test dips and temperature adjustments.
- Overworking the dough causes density, so handle it lightly and rest it for at least 20 minutes to ensure a soft, fluffy texture.
- Fry in small batches without crowding the pan to prevent temperature drops and achieve evenly golden, crisp fry bread.
- Reheating in a dry pan or oven preserves texture better than microwave, and preparing the dough ahead allows for easy baking during gatherings.
Table of Contents
- Maori fried bread recipe ingredients you’ll need
- How to make Māori fried bread step by step
- Why does my fried bread turn out greasy or dense?
- What goes well with Māori fried bread?
- Using Missy Lala’s baking mix for parāoa parai
- A note on sharing this recipe well
- Get baking without the pantry hunt
- Sources
- FAQ
Maori fried bread recipe ingredients you’ll need
Getting the ratios right matters more than any fancy technique here. Parāoa parai is a humble dough, but the flour, fat, and liquid balance determines whether you end up with something fluffy or something dense enough to sink a ka.
Here’s what a standard batch calls for:
- 500g self-raising flour (or high-grade flour plus 3 teaspoons baking powder and 1 teaspoon salt)
- 1 teaspoon salt (skip if your flour is pre-salted)
- 1 tablespoon sugar (optional, but it helps browning)
- 2 tablespoons melted butter or oil, worked through the dry mix
- 300 to 350ml warm water, added gradually until the dough just comes together
- Frying oil: rice bran, canola, or sunflower oil, roughly 4 to 5cm deep in the pan
Self-raising flour is the quicker path since the leavening’s already built in, and it needs less resting time before frying. High-grade flour with separate baking powder gives you more control over rise, and some traditional NZ recipes use yeast instead for a slightly tangier, more developed flavour, though that means budgeting closer to an hour for proving.
On oil: rice bran oil is the standout choice because it has a high smoke point and barely any flavour of its own, so it won’t compete with the bread. Canola works nearly as well and is usually cheaper. Sunflower oil is fine in a pinch, but it browns food a touch faster, so watch your batches closely if that’s what’s in the pantry.
If you’d rather skip the flour, baking powder, and measuring altogether, Missy Lala’s Cook Islands Donut Baking Mix does the same job with only water and oil added, and it’s built to handle fried treats like this one without any guesswork on ratios.
How to make Māori fried bread step by step
Mix the dough until it just comes together, rest it for a short time, shape it into flattened rounds, then shallow-fry each side for a few minutes at an appropriate temperature until deep golden.
That’s the whole method in one sentence. Here’s how each stage actually plays out at the bench.
- Combine dry ingredients. Whisk flour, salt, and sugar (if using) in a large bowl.
- Add fat and water. Rub in the melted butter or oil, then pour in warm water gradually, stirring with a fork or your hand until a shaggy dough forms. Stop adding water the moment it holds together. A dough that’s slightly tacky but not sticky is exactly right.
- Handle it lightly. Bring the dough together with a few light folds, no more than 10 to 15 seconds of actual kneading. This is the step most home cooks get wrong, and it’s the single biggest factor in whether your fry bread turns out light or leathery.
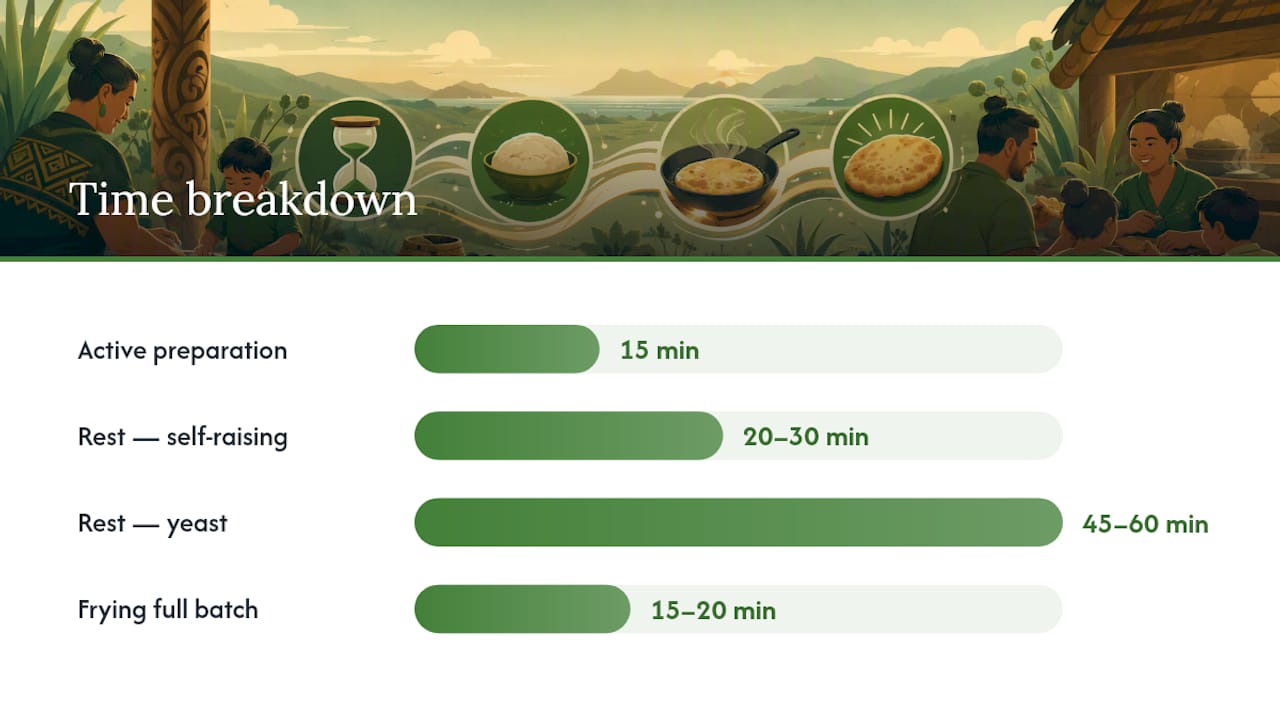
- Rest the dough. Cover with a tea towel and let it sit for 20 to 30 minutes if using self-raising flour, or 45 to 60 minutes if using yeast, so gluten relaxes and the crumb softens. You’ll notice the dough looks slightly puffed and feels less resistant when you press it. That’s your cue it’s ready.
- Divide and shape. Portion the dough into 10 to 12 pieces. Flatten each into a round about 1.5cm thick using your palms, not a rolling pin, which tends to overwork the dough and push out the air you just protected. A small dimple pressed into the centre of each round helps it cook evenly without puffing into an uneven ball.
- Heat the oil. Pour oil to about 4 to 5cm depth in a heavy-based pan and heat to roughly 160 to 165°C. No thermometer? Dip the handle of a wooden spoon into the oil. Steady small bubbles rising around the handle mean the oil is at the right temperature; rapid, aggressive spluttering means it’s too hot and needs a minute to cool.
- Fry in small batches. Slide two or three rounds into the oil at a time, never crowding the pan, since overcrowding drops the oil temperature and leads to greasy, undercooked bread. Fry for 2 to 3 minutes per side until deep golden brown, flipping once with tongs.
- Drain and rest. Lift onto a wire rack over paper towel, not straight onto a plate, so steam escapes and the underside doesn’t turn soggy. Let each piece rest for a minute before serving.
Pro Tip: Fry one test piece before committing the whole batch. If it browns too fast or stays pale after three minutes, adjust the oil temperature before you fry the rest, since the first piece tells you everything about how the following ones will cook.
Total active time sits around 15 minutes, resting adds another 20 to 60 depending on your flour choice, and frying the full batch takes about 15 to 20 minutes. Traditional practitioners consistently point to one rule above all others for texture: keep your hands out of the dough as much as possible, because minimal handling is what keeps parāoa parai light rather than chewy.
Why does my fried bread turn out greasy or dense?
Greasy fry bread almost always means the oil was too cool, and dense fry bread almost always means the dough was overworked. Both faults are fixable once you know what to look for.
Common causes and fixes:
- Oil too cool: bread absorbs oil instead of sealing, leaving it heavy and greasy. Fix by letting the oil come back to 160 to 165°C between batches and testing with the wooden spoon method before adding more dough.
- Oil too hot: the outside turns dark within a minute while the centre stays raw. Fix by pulling the pan off heat for 30 to 60 seconds and re-testing before continuing.
- Overworked dough: dense, chewy texture from too much kneading develops the gluten too far. Fix next time by folding the dough together in under 15 seconds rather than kneading it like bread.
- Dough too thick: centres stay doughy even when the outside looks perfect. Fix by flattening rounds to a consistent 1.5cm and testing one piece first.
- Not enough rest: dough that hasn’t relaxed springs back and fries unevenly. Give it the full 20 to 30 minutes, or longer for feasted versions.
If a batch does turn out heavier than you’d like, blotting well on paper towel and finishing in a 180°C oven for five minutes can rescue the texture somewhat, crisping the surface without adding more oil. One RNZ-documented insight worth remembering: less handling reliably produces lighter texture, a rule that holds regardless of which flour or leavening method you use.
Cooked fry bread keeps well in an airtight container at room temperature for a day, and reheats best in a dry pan or oven rather than the microwave, which turns it soft and a little rubbery. For make-ahead baking, portion and shape the dough rounds, then refrigerate them covered for up to a few hours before frying fresh.
What goes well with Māori fried bread?
Parāoa parai swings easily between breakfast table and dinner plate, which is part of why it’s stayed a fixture at gatherings for so long.
Sweet options:
- Butter and golden syrup, the classic pairing
- Cinnamon sugar dusted on while still warm
- Jam and whipped cream for a dessert-style plate
Savoury pairings:
- Alongside a boil up or hāngī sides, soaking up the juices
- Split and filled with cheese and cold meats for a packed lunch
- Topped with baked beans or a fried egg for a hearty breakfast
For gatherings, fold or stuff pieces around a savoury filling before frying so they travel well in a shared kai basket, and cut larger rounds into wedges for easy potluck portioning. Parāoa parai has long shown up at communal occasions like hākari and Matariki celebrations, served alongside both sweet and savoury dishes rather than one or the other. That flexibility is exactly why it’s stayed a staple: one dough, endless ways to serve it.
Using Missy Lala’s baking mix for parāoa parai
Missy Lala’s Cook Islands Donut Baking Mix works as a genuine shortcut for parāoa parai, since it’s built around the same principle: a simple dough that only needs water and oil added before frying.
- 250g mix suits a small household batch, roughly matching the scratch recipe’s yield of 10 to 12 pieces.
- 650g mix is the better call for larger gatherings or when you’re feeding a crowd across a weekend of baking.
- Island Memories Bundle pairs the mix with extras, worth considering if you’re setting up for a family baking session or gifting someone their first go at island-style treats.
Converting the mix for fry bread is straightforward: follow the pack’s water and oil ratio, then shape and fry exactly as you would the scratch dough, using the same 160 to 165°C target and light handling approach. It shaves the ingredient list down to almost nothing and cuts prep time noticeably, since there’s no flour measuring or baking powder to get wrong.
If you’re chasing a specific texture memory, say, a particular grandmother’s version with yeast and a longer rest, scratch dough still gives you more control. But for a reliable, family-friendly result on a weeknight, the mix earns its place in the pantry.
A note on sharing this recipe well
Parāoa parai carries real history in it, tied to community and gathering rather than just a quick snack. Writing this recipe down doesn’t mean flattening that into a generic bread roll.
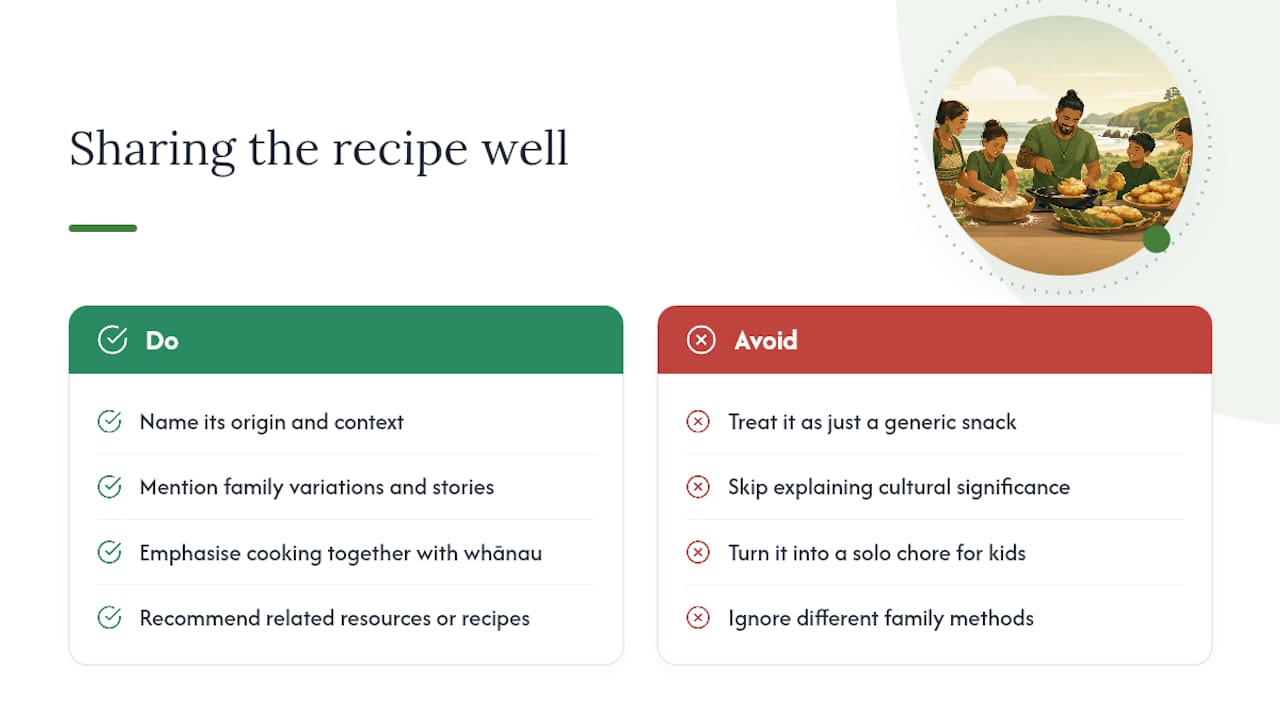
Every family seems to have its own version, a slightly different rest time, a particular fold, a story about who taught them to fry it just right. If you’re sharing this with whānau or friends who didn’t grow up with it, take a moment to mention where it comes from and why it’s traditionally served at gatherings like Matariki rather than treating it as just another fried snack recipe. That context is part of the dish.
Cooking together, whether that’s over a scratch dough or a baking mix, tends to matter more than which method you choose. If you’re keen to build on that with the kids, our piece on family baking activities has more ideas for turning the kitchen into shared time rather than a solo chore. And if this recipe’s given you a taste for more island-style frying, our Cook Islands donuts recipe is a natural next stop.
— Jasmin
Get baking without the pantry hunt
Missy Lala is the easier route to parāoa parai when you’d rather skip weighing flour and calculating baking powder ratios altogether. The Cook Islands Donut Baking Mix in 250g suits a small household batch and needs only water and oil, while the 650g mix is the practical pick when you’re frying for a larger gathering or a weekend of baking with the kids.
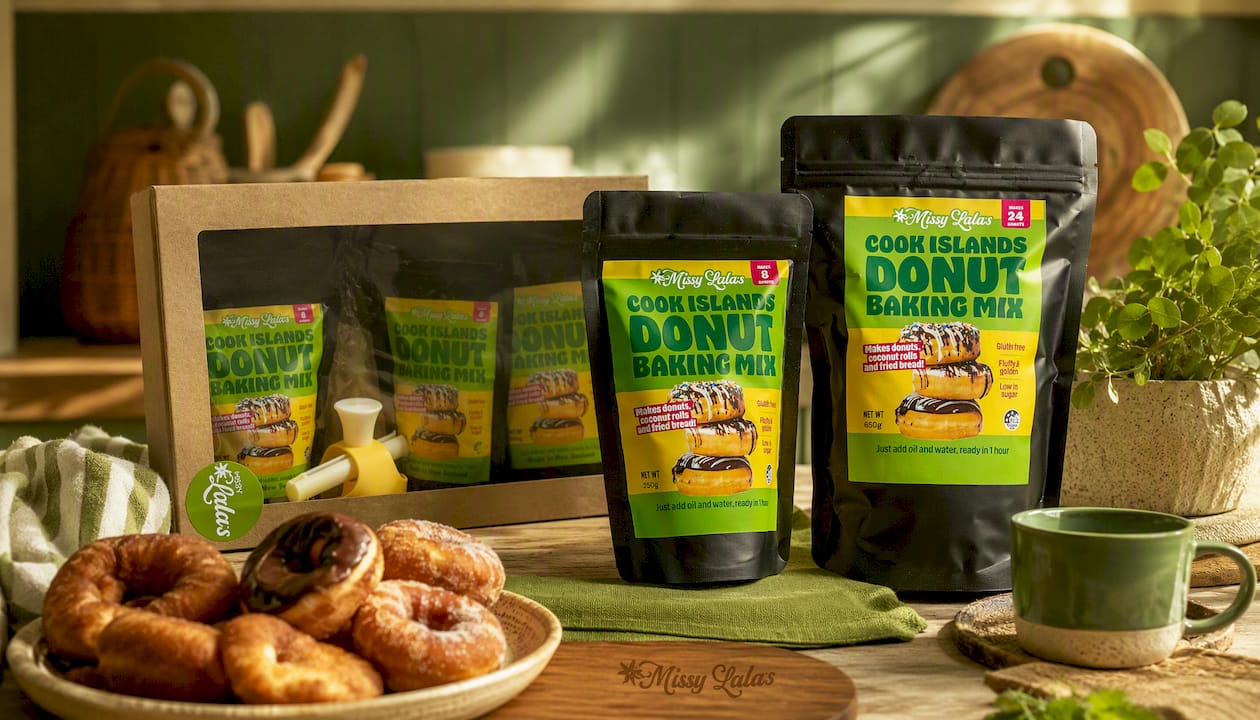
If you’re setting a family up to bake regularly or want to gift someone their first island-style baking session, the Island Memories Bundle bundles the mix with everything needed to get started. Every option cuts prep time down to minutes while still landing that golden, fluffy result parāoa parai is known for. Browse the full range of baking mixes and pick the size that matches your next bake.
Sources
- Māori foods (kai Māori) — Te Ara
- He Paraoa Parai - Fry Bread — RNZ
- Matariki Parāoa Parai (Fry Bread) Recipe — Kai Ora Honey
- Easy Light and Fluffy Fry Bread (Traditional NZ Style Recipe) — WhānauKai
FAQ
What is Māori fried bread called?
It’s called parāoa parai, sometimes spelled paraoa parai, a fried bread traditionally shared at communal gatherings such as hākari and Matariki.
What is the best oil temperature for frying parāoa parai?
Around 160 to 165°C works best. Test with a wooden spoon handle: steady small bubbles mean the oil is ready, while rapid spluttering means it’s too hot.
Why is my fry bread dense instead of fluffy?
Overworking the dough is the most common cause. Fold it together for under 15 seconds rather than kneading it like bread, and give it the full 20 to 30 minute rest before shaping.
Can I use a baking mix instead of making the dough from scratch?
Yes. Missy Lala’s Cook Islands Donut Baking Mix uses just water and oil and can be shaped and fried the same way as scratch dough, making it a reliable shortcut for family baking.
How long does parāoa parai keep once cooked?
It keeps well in an airtight container at room temperature for about a day, and reheats best in a dry pan or oven rather than a microwave to preserve the crisp exterior.


