

165–175°C and 30-Min Rest: Navajo & Māori Fry Bread Dough for Families
Fry bread dough comes down to four things: flour, baking powder, salt, and enough water or milk to bring it together into a soft, workable ball. The one step that separates good fry bread from tough, chewy discs is resting the dough for a brief but adequate time before you shape it. Fry it in oil between 165°C and 175°C, and you’ll get a golden, puffed result every time.
TL;DR:
- Resting the dough for at least 10 to 30 minutes is crucial to relax gluten and prevent shrinkage during shaping.
- Frying at a temperature of 165°C to 175°C produces the best puffed, golden results with minimal greasiness.
- Using a light dusting of flour during shaping helps prevent sticking without toughening the dough or adding excess flour.
- Gluten-free or dairy-free substitutions require longer resting times to compensate for reduced elasticity and structure.
- Store raw dough in the fridge for up to 24 hours or freeze portions for up to a month, but cooked fry bread should be eaten within a day or three for optimal texture.
Table of Contents
- How to make fry bread dough the Navajo way
- Māori parāoa parai: a fried bread with its own history
- Getting the oil temperature and dough handling right
- Using Missy Lala Cook Islands Donut Baking Mix for fry bread
- Gluten-free and dietary swaps that still work
- Storing fry bread dough and leftover bread
- Fry bread carries a story worth telling alongside the recipe
- Buy Missy Lala Cook Islands Donut Baking Mix
- Primary sources and recipe references
- Sources
- FAQ
How to make fry bread dough the Navajo way
Navajo fry bread built its reputation on simplicity, and that simplicity is exactly why it rewards careful technique. The dough itself uses pantry staples, but the handling matters more than any single ingredient.
For a batch that feeds four to six people, you’ll need:
- 3 cups plain flour
- 1 tablespoon baking powder
- 1 teaspoon salt
- 1 cup warm water or milk (milk gives a slightly richer crumb)
- 2 tablespoons melted butter or lard, optional but traditional
- Vegetable oil, for frying (enough for 3 to 4 cm depth in your pan)
Whisk the dry ingredients together first, then pour in the liquid and fat if you’re using it. Mix with your hands or a wooden spoon just until a soft dough forms. This is where most home cooks go wrong: kneading fry bread dough like you would a yeast bread develops too much gluten and leaves you with something closer to a rubber disc than a light, chewy piece of bread. A dozen gentle folds is plenty.
Cover the dough and let it rest for a suitable short period. This resting period lets the gluten relax, which makes the dough easier to roll and stops it springing back into a smaller shape the moment you stretch it. Divide the rested dough into several portions, then roll or press each one to roughly a thin thickness typical for fry bread. Poke a small hole through the centre of each disc with your finger or a skewer before frying. This stops one giant air pocket forming in the middle, which otherwise leaves you with bread that’s raw in the centre and burnt on the edges.
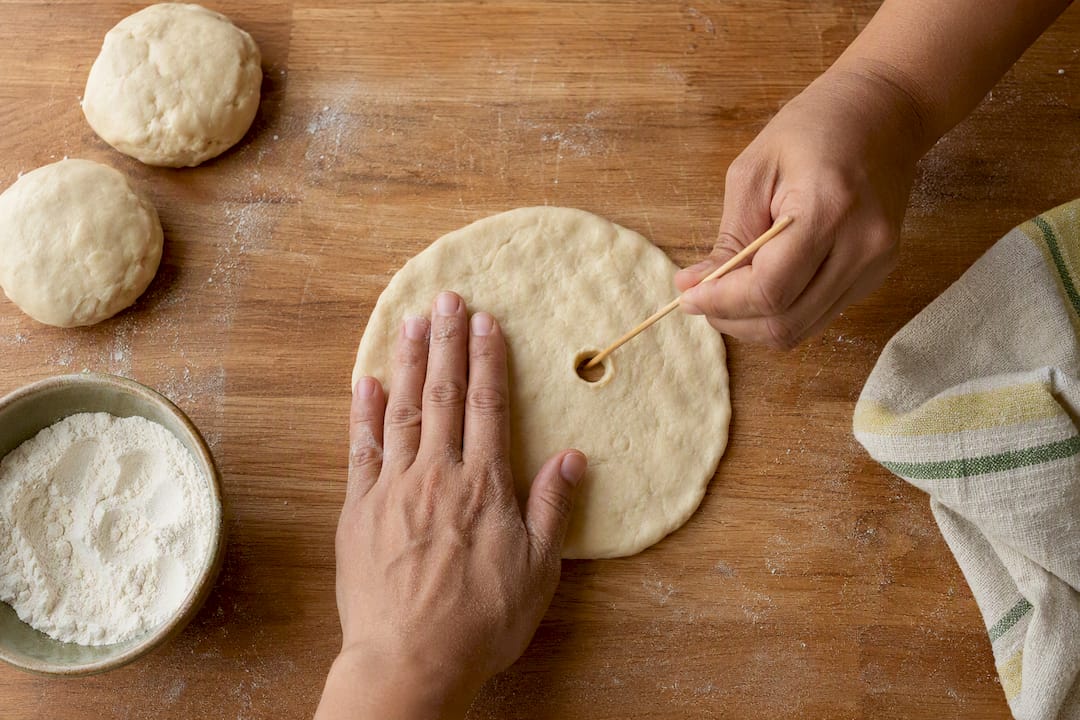
Fry bread success rate improves dramatically when oil sits in the 165°C to 175°C range, according to Food Network. Fry each piece for roughly 1.5 to 3 minutes per side, turning once it’s deep golden brown, then drain on paper towels or a wire rack.
Serve it warm as the base for a Navajo taco, piled with seasoned mince, beans, lettuce, tomato, and cheese, or keep it simple with a dusting of cinnamon sugar or a drizzle of honey. Always fry with a lid or splatter guard nearby and keep children and pets clear of the pot. Hot oil doesn’t forgive carelessness.
Māori parāoa parai: a fried bread with its own history
Parāoa parai (sometimes called Māori fried bread) shares its backbone with Navajo fry bread but carries its own texture and flavour, shaped by what was available in Aotearoa after European contact introduced wheat flour and baking powder to Māori communities, as Te Ara documents. The result is a denser, slightly chewier bread than the pillowy Navajo version, often fried in dripping or lard rather than a neutral vegetable oil.
A standard batch:
- 4 cups plain flour
- 4 teaspoons baking powder
- 1 teaspoon salt
- 1 to 2 tablespoons sugar, optional (some families skip it entirely for a savoury loaf)
- 1.5 to 2 cups warm water, enough for a firm but pliable dough
- Lard, dripping, or oil for frying
Mix the dry ingredients, then work in the water gradually until the dough holds together without being sticky. Parāoa parai dough tends to be rolled a touch thicker than Navajo fry bread, closer to 1 to 1.5 cm, which gives it that heavier, more bread-like bite families associate with the dish. Shape into rounds or ovals, and fry in hot fat until each side is golden brown, usually taking longer due to the thicker dough.
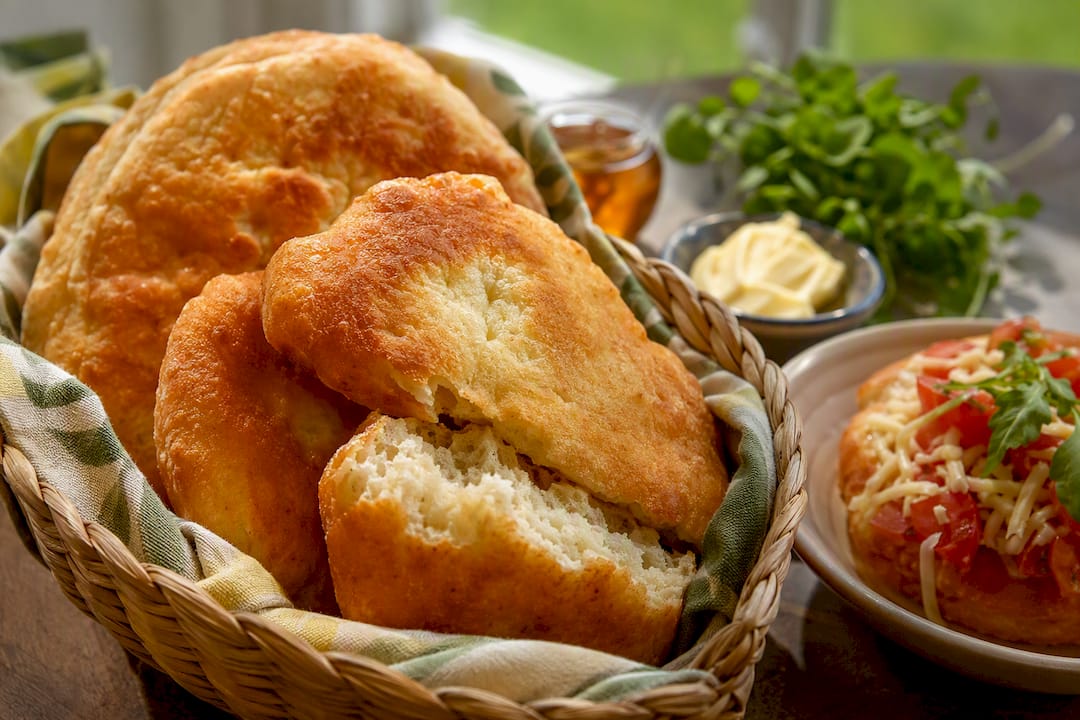
Parāoa parai turns up regularly at hākari (feasts) and Matariki gatherings, served alongside boil-up, watercress, or simply spread with butter and golden syrup while it’s still warm. Modern families often update it with jam, whipped cream and fruit for dessert, or savoury toppings like cheese and tomato for a quick lunch. It travels well too, wrapped in foil for school lunches or picnics, which is part of why it’s stayed a staple across generations.
Getting the oil temperature and dough handling right
Temperature control makes or breaks fry bread, whichever recipe you’re following. Oil that’s too cool soaks into the dough before it can seal the outside, leaving you with a heavy, greasy result. Oil that’s too hot scorches the surface before the centre has a chance to cook through.
A cooking thermometer clipped to the side of a heavy-bottomed pot removes the guesswork. It’s worth the small investment if you fry regularly. If you don’t have one, The Washington Post recommends the scrap-of-dough test: drop a small piece into the oil, and if it sizzles immediately and floats to the surface within a few seconds, you’re in the right zone.
Pro Tip: Keep a spare bowl of flour nearby while you’re shaping. A light dusting on your hands and the rolling surface stops the dough sticking without you needing to work extra flour into the dough itself, which would toughen it.
Resting time isn’t a formality you can skip when you’re in a hurry. Ten minutes is the bare minimum; 30 minutes gives noticeably better results, and you can push it to an hour in the fridge if that suits your schedule better. Skipping the rest is the single most common reason home cooks end up fighting dough that keeps shrinking back every time they try to roll it out.
Common problems and quick fixes:
- Dough too tough or dense: usually over-kneading or too much flour worked in during shaping. Handle it as little as possible and measure flour by spooning it into the cup rather than scooping directly from the bag.
- Bread turns out greasy: oil has dropped below 165°C, often from overcrowding the pan with too many pieces at once. Fry in smaller batches and let the oil recover its temperature between rounds.
- Uneven browning: oil temperature is swinging up and down. Adjust the heat gradually rather than in big jumps, and give the oil a minute to stabilise after each addition.
- Centre stays raw: the disc is likely too thick, or the oil isn’t hot enough to cook through in the time the outside needs to brown. Smithsonian Magazine suggests rolling slightly thinner or nudging the oil a few degrees higher if this keeps happening.
- Dough too sticky to shape: add flour a tablespoon at a time rather than all at once, since fry bread dough firms up fast once it’s had a few minutes to rest.
Using Missy Lala Cook Islands Donut Baking Mix for fry bread
A donut baking mix built for consistency works just as well for fry bread as it does for its intended job, with a small adjustment to the liquid. Missy Lala’s Cook Islands Donut Baking Mix is designed to need only water and oil, which makes it a genuinely quick option on nights when you want Māori fried bread on the table without measuring out flour, baking powder, and salt separately.
- The 250g pack suits a smaller family batch or a trial run before committing to a bigger bake.
- The 650g pack covers a full family gathering or a Matariki spread with room to spare.
- Consistency can be an advantage, helping ensure similar results across batches, which is helpful when baking with children.
- The mix is also flexible enough for cinnamon rolls and coconut rolls once you’ve got the base dough sorted, so one pack covers more than one occasion.
Gluten-free and dietary swaps that still work
Standard fry bread dough relies on wheat flour for its structure, so swapping it out changes the texture more than most substitutions. A 1:1 gluten-free flour blend with xanthan gum already included tends to give the closest result to the original, since the gum mimics some of the elasticity that gluten would otherwise provide.
Dairy-free households can swap milk for water or a plant milk without much difference in outcome, since the fat content in milk is minor compared with what the frying oil contributes. If you’re avoiding lard or dripping for the Māori-style recipe, a neutral vegetable oil or a plant-based shortening works as a direct substitute in both the dough and the frying step.
For lower-sugar versions of parāoa parai, simply drop the sugar altogether. It’s optional in most traditional recipes anyway, and the bread still browns and puffs properly without it. Reduced-sodium diets can cut the salt back to a pinch, though flavour will be noticeably flatter, so it’s worth compensating with a savoury topping rather than skipping seasoning entirely.
Whatever swap you’re making, expect the resting time to matter even more. Gluten-free doughs in particular benefit from the full 30 minutes, since they don’t have the same natural elasticity to fall back on if you rush the shaping.
Storing fry bread dough and leftover bread
Raw fry bread dough keeps in the fridge, wrapped tightly in plastic or sealed in an airtight container, for up to 24 hours. Any longer and the baking powder starts losing its lift, which means flatter, denser bread when you finally fry it.
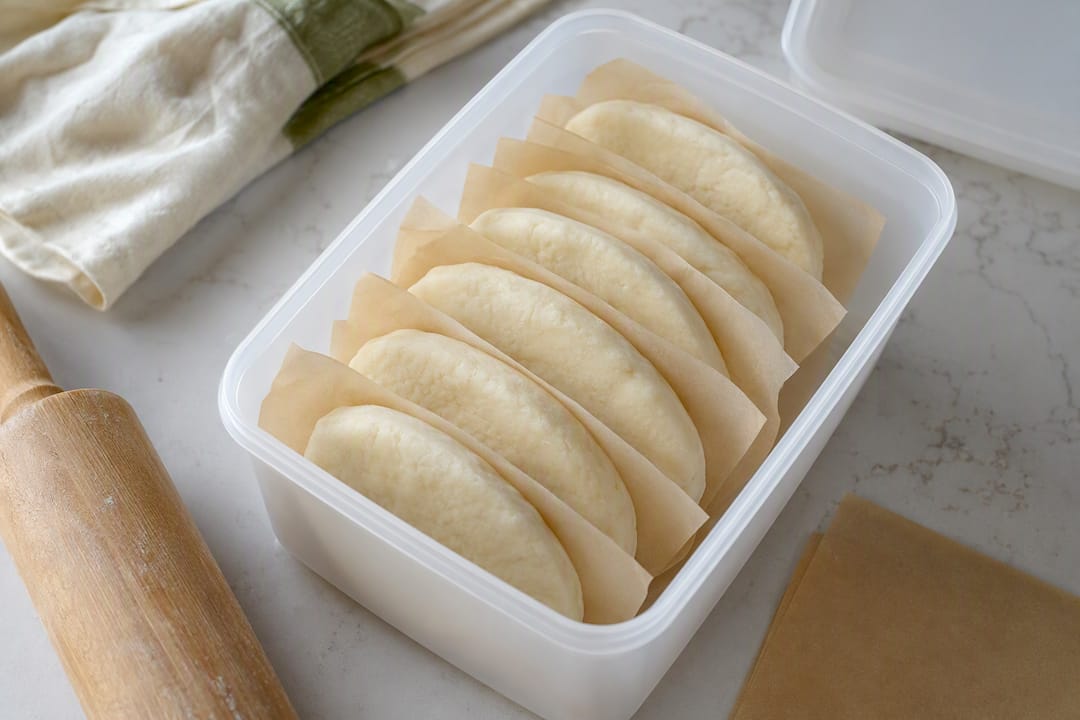
If you want to prep further ahead, portion the dough into individual discs, separate them with baking paper, and freeze for up to a month. Thaw in the fridge overnight before rolling and frying, and give the dough a few extra minutes at room temperature if it feels stiff.
Cooked fry bread is best eaten the day it’s made, when it’s still warm and slightly crisp on the outside. Leftovers keep in an airtight container at room temperature for a day, or in the fridge for up to three days. Reheat in a dry frying pan or a low oven rather than the microwave, which turns the texture soft and a bit rubbery instead of restoring the original crispness.
Fry bread carries a story worth telling alongside the recipe
Fry bread means something different depending on whose kitchen it comes from. Navajo fry bread grew out of hardship, from rations of flour and lard handed to Native American communities forced from their land. Parāoa parai reflects a different history, shaped by introduced ingredients folded into existing Māori food traditions. Making either at home is worthwhile, but it’s worth saying where the recipe comes from when you serve it to family or friends. A shared meal is a good moment to pass on a bit of that history, not just the food itself.
— Jasmin
Buy Missy Lala Cook Islands Donut Baking Mix
Missy Lala’s Cook Islands Donut Baking Mix cuts the ingredient list for a family bake down to water and oil, which matters most on a weeknight when nobody wants to hunt through the pantry for baking powder before dinner.
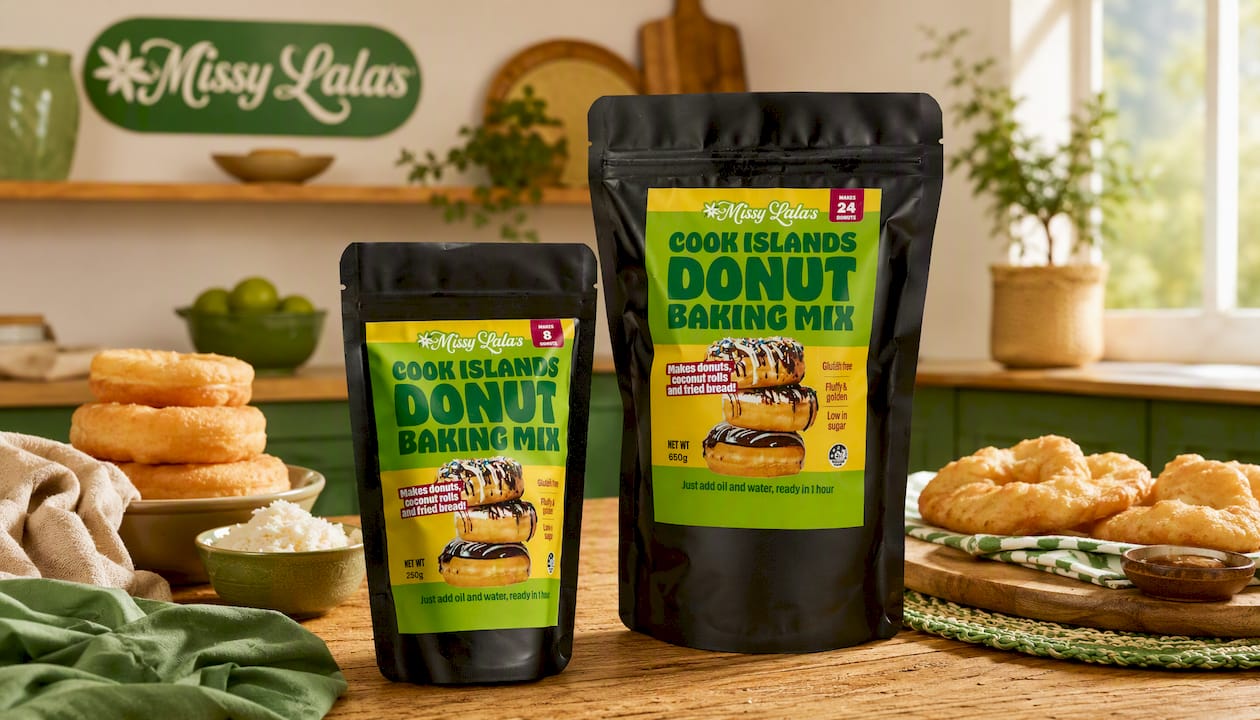
It’s suitable for busy parents looking for a reliable result without a long ingredient list, for anyone buying a gift for someone who enjoys island baking, and for families who want an easy way to keep a cultural recipe alive in their own kitchen. The 250g pack is the right starting point if you’re trying fry bread for the first time, while the 650g pack makes more sense once fry bread night becomes a regular fixture. Order online and have your next batch of fried bread ready in under an hour.
Primary sources and recipe references
- Fry Bread recipe | Food Network Kitchen | Food Network
- Frybread recipe | Smithsonian Magazine
- Frybread recipe | Food52
- Fry bread recipe | The Washington Post
- Te Ara — Te Māori in the economy
Sources
- Fry Bread recipe | Food Network Kitchen | Food Network
- Frybread recipe | Smithsonian Magazine
- Frybread recipe | Food52
- Fry bread recipe | The Washington Post
FAQ
How do you make fried bread dough?
Mix flour, baking powder, and salt, then stir in warm water or milk until a soft dough forms. Rest it for 10 to 30 minutes, roll into discs 6 to 8 mm thick, pierce the centre, and fry in oil at 165°C to 175°C for 1.5 to 3 minutes per side.
What is fried bread dough called?
It’s most commonly called fry bread in Navajo and other Native American traditions, and parāoa parai in Māori cooking. Similar fried breads worldwide include sopapillas, vetkoek, bhatura, and lângos, each with its own regional twist.
Is fry bread the same as fried dough?
Fry bread and fried dough are essentially the same technique, a leavened dough fried in oil until puffed and golden, but the term “fry bread” usually refers specifically to Native American and Pacific traditions like Navajo fry bread and parāoa parai.
What are the three ingredients in fry bread?
At its simplest, fry bread needs flour, baking powder, and salt, with water or milk added to bring the dough together. Many recipes also include a pinch of fat, such as butter or lard, though it’s optional rather than essential.
Can I make fry bread dough without yeast?
Yes, and most traditional recipes never use yeast at all. Fry bread relies on baking powder for lift, which is faster and simpler than proofing a yeasted dough, and it’s part of why the bread has such a soft, tender crumb when handled gently.


